
Bathroom Renovation Planning: A Room-by-Room Walkthrough
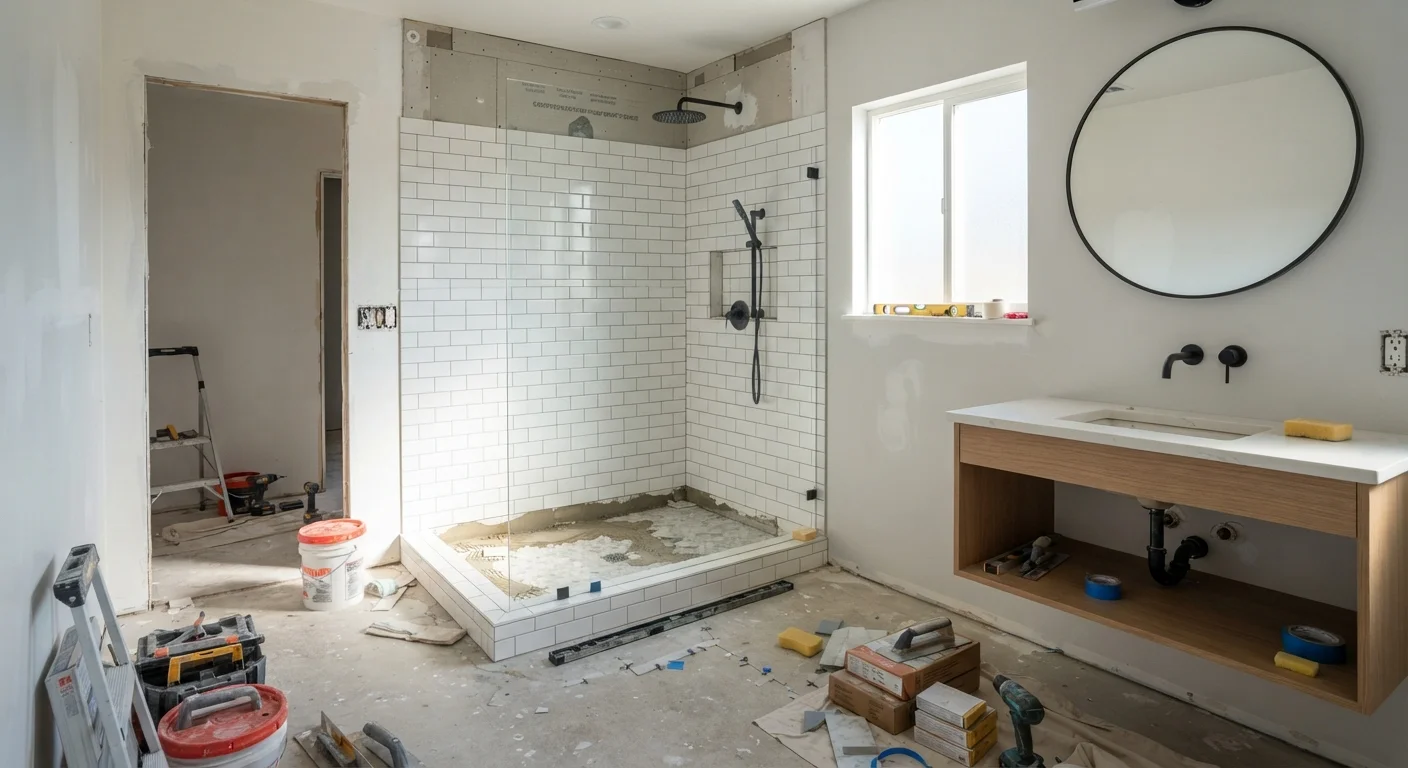
Photo credit: SkripTee.com | Search. Explore. Learn.
In this article
- Why Bathroom Renovations Deserve a Dedicated Plan
- Layout Decisions: Working With or Against Your Existing Footprint
- Waterproofing, Permits, and Code Requirements
- Fixtures, Surfaces, and Finishes: Prioritizing What Lasts
- Budgeting and Financing Your Bathroom Project
- Sequencing the Work: A Stage-by-Stage Overview
From layout decisions to waterproofing requirements, this guide walks you through every stage of planning a bathroom renovation the right way.
Key Takeaways
- Bathroom renovations that stay within the existing footprint cost significantly less and require fewer permits.
- Proper waterproofing is non-negotiable - improper application is among the most common sources of costly post-renovation damage.
- Fixture and tile selection should prioritize durability and maintenance over trend-driven aesthetics alone.
- A realistic budget includes a contingency reserve of at least 15-20% for unforeseen issues inside walls or under floors.
- Sequencing trades correctly - plumbing and electrical before tile - prevents rework and controls costs.
Why Bathroom Renovations Deserve a Dedicated Plan
Bathrooms are among the most technically complex rooms in any home. Water supply lines, drain stacks, ventilation, electrical circuits, and waterproofed surfaces all converge in a compact space where failures are immediately disruptive. A poorly sequenced or under-budgeted renovation can result in mold remediation, code violations, or expensive rework within just a few years.
According to remodeling cost reports published by the National Association of Realtors, bathroom renovations consistently rank among the home improvements most likely to recover a meaningful portion of their cost at resale - but only when the work is done correctly and to current code. If you're approaching your first major project, the beginner's guide to home renovation is a useful starting point before diving into bathroom-specific planning.
71%
Cost recouped on a mid-range bathroom remodel
According to Remodeling Magazine's Cost vs. Value report, mid-range bathroom remodels historically recoup a significant portion of project cost at resale.
15-20%
Recommended contingency budget for renovations
Industry practitioners widely recommend holding a contingency reserve of at least 15-20% above base estimates to cover unforeseen conditions discovered during demolition.
$10K-$25K
Typical mid-range full bathroom renovation cost
National averages from remodeling industry surveys place full mid-range bathroom renovations in this range, with significant regional variation in labor costs.
Layout Decisions: Working With or Against Your Existing Footprint
The single most consequential decision in any bathroom renovation is whether to keep plumbing fixtures where they are or relocate them. Moving a toilet, shower, or tub requires extending drain lines - which often means cutting into the subfloor or, in multi-story homes, rerouting through the ceiling below. This substantially increases both labor cost and structural complexity.
Working within the existing footprint - replacing fixtures in-place, retiling, and upgrading cabinetry - delivers a refreshed bathroom at a fraction of the cost of a full gut renovation. For larger homes where reconfiguring space is on the table, it's worth reading our analysis of layout trade-offs before renovating to understand how spatial decisions compound across a home.
Before finalizing any layout change, ask your plumber to identify where the main drain stack runs. Positioning new fixtures on the same wall as the stack dramatically reduces cost and complexity.
Drain lines must slope toward the stack at a precise grade. The farther a fixture is from the stack, the more floor structure must be modified to achieve correct slope - adding labor and risk.
Commission a moisture reading of the existing subfloor before your contractor begins tiling. Any reading above 19% typically requires remediation before new materials are installed.
Tiling over a subfloor with elevated moisture content accelerates tile adhesive failure and can trap conditions that promote mold growth behind the finished surface.
Waterproofing, Permits, and Code Requirements
Waterproofing is the step most frequently underestimated by homeowners managing their own renovations. In wet areas - the shower floor, shower walls up to a minimum height specified by local code, and around bathtub surrounds - a continuous waterproof membrane must be applied before any tile is set. This membrane, not the tile or grout itself, is what prevents water from reaching the subfloor and framing.
Most jurisdictions in the U.S. require a building permit for bathroom renovations that involve moving or adding plumbing, electrical changes (adding circuits, relocating outlets), or structural modifications. Working without required permits can create complications when you sell the home, as unpermitted work may need to be disclosed or remediated. Always verify local requirements with your municipality's building department before work begins.
Never Skip the Waterproof Membrane Inspection
Tile and grout alone are not waterproof. Without a properly installed membrane beneath wet-area tile, water will eventually reach your subfloor and framing - causing rot, mold, and structural damage that can cost far more to repair than the original renovation. If you are working with a contractor, request to inspect the membrane installation and confirm it has cured before tile work begins. Many jurisdictions allow or require an inspector to verify this stage before proceeding.
Fixtures, Surfaces, and Finishes: Prioritizing What Lasts
Tile, vanities, faucets, and shower fixtures vary enormously in quality. In a high-moisture environment, material selection directly affects how long a renovation looks and performs. For flooring, porcelain tile with a slip-resistance rating of R10 or higher is a widely recommended standard for wet areas. On walls, large-format tiles (24x24 inches or greater) reduce grout lines, which in turn reduces the surface area vulnerable to mold and staining.
Vanity selection should account for the cabinet box material, not just the door finish. Solid wood or plywood boxes hold up to humidity far better than particleboard, which swells and degrades when moisture penetrates. For fixtures, solid brass internals in faucets and valves outlast zinc alloy alternatives - a distinction often hidden by identical exterior appearances.
If you're weighing how deeply to invest compared with a kitchen project, our editorial on where to spend and where to save in home renovation offers a useful comparative framework.
Match Grout Color Strategically
Light-colored grout in high-traffic wet areas shows staining and discoloration within months without consistent sealing. Specifying a mid-tone or charcoal grout in shower floors significantly reduces visible maintenance demands over time. Ask your tile supplier about epoxy grout for shower floors - it is more stain-resistant than traditional cement-based grout, though it requires more care during installation.
Budgeting and Financing Your Bathroom Project
Industry data suggests that a mid-range full bathroom renovation in the U.S. typically falls in a range of $10,000-$25,000, with high-end or primary suite projects reaching considerably higher. These figures shift based on regional labor costs, fixture grade, and whether plumbing or electrical work is required. A contingency of 15-20% above your base estimate is not optional - it accounts for what is routinely discovered once walls are opened: outdated wiring, deteriorated subfloor, improper prior plumbing, or mold remediation.
Homeowners considering financing should understand the difference between home equity lines of credit, personal loans, and cash-out refinancing before committing. Our educational overview of home improvement financing options explains the structural trade-offs of each approach. General financial guidance of this kind is informational - consult a licensed financial professional before making decisions tied to your personal circumstances.
Sequencing the Work: A Stage-by-Stage Overview
Trade sequencing is where many DIY-managed renovations run into trouble. The correct order of operations in a bathroom renovation follows a logical dependency chain:
- Demolition - Remove existing fixtures, tile, and cabinetry. Assess subfloor and wall framing condition before proceeding.
- Rough plumbing and electrical - Any new supply lines, drain relocations, exhaust fan wiring, or GFCI circuit additions happen before walls are closed. Inspections typically occur at this stage.
- Waterproofing and backer board installation - Cement board or equivalent tile backer is installed; waterproof membrane is applied in wet zones and allowed to cure per manufacturer specifications.
- Tile installation - Floor tile first, then wall tile. Grout is applied after adhesive has set fully.
- Vanity and fixture installation - Toilets, vanities, faucets, and shower fixtures are set after tile is complete to prevent damage during laying.
- Finishing - Trim, mirrors, lighting fixtures, and accessories are installed last.
If your renovation is part of a broader pre-sale strategy, the pre-sale renovation checklist can help you prioritize which bathroom improvements deliver the strongest return relative to cost before listing.
This article is for general informational and educational purposes only. Always verify local building codes and permit requirements with your municipality, and consult licensed contractors for work involving plumbing, electrical systems, or structural elements.

Author
Real Estate Editorial Team
Real Estate Editorial Team is the collective byline for our editorial team and contributor network. Articles published under this byline or an editorial pen name are researched, written, and reviewed according to our editorial standards for clarity, consistency, and independence before publication.
View all articles →