
Getting Started with Home Brewing: Beer Basics Without the Jargon
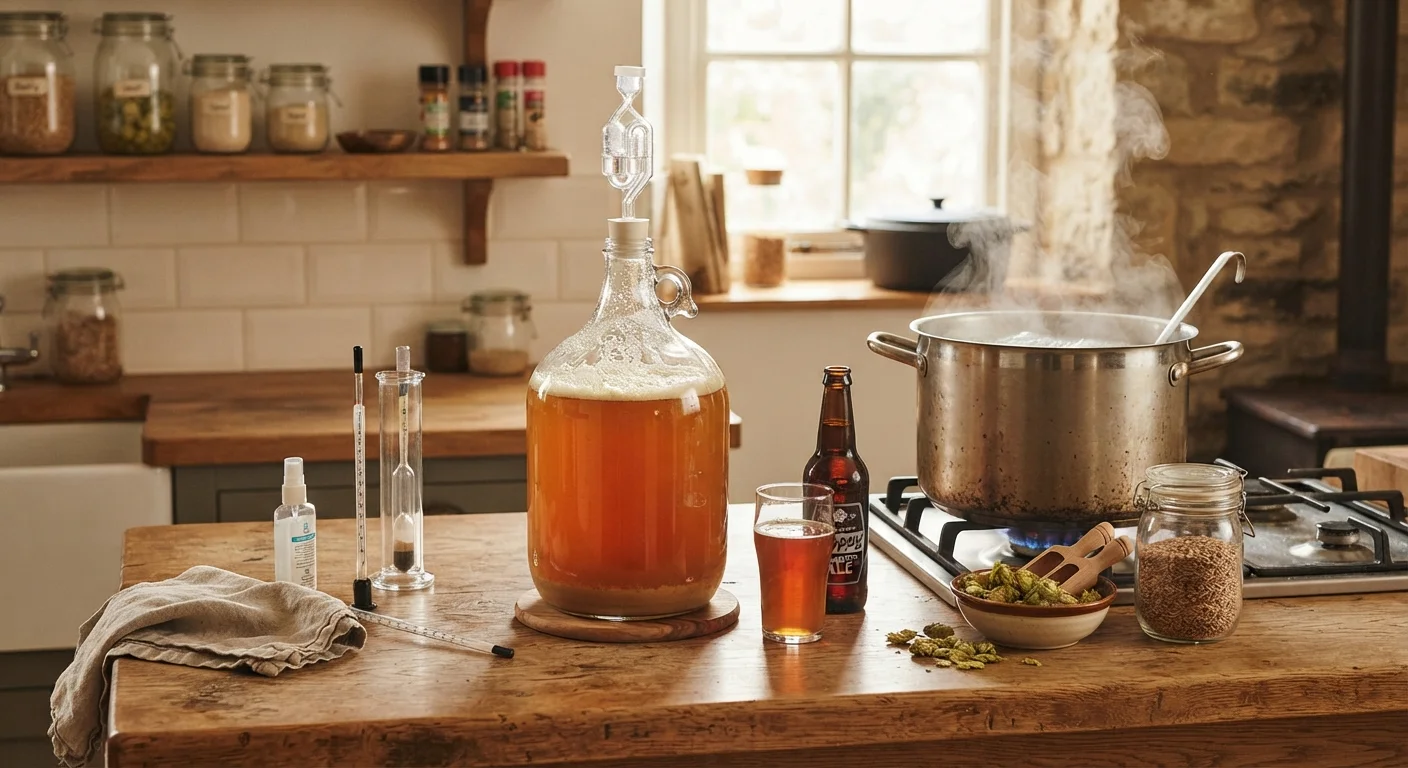
Photo credit: SkripTee.com | Search. Explore. Learn.
In this article
Curious about making beer at home? This introduction covers the core ingredients, process stages, and what to realistically expect.
Key Takeaways
- Beer requires only four ingredients: water, malted grain, hops, and yeast.
- The brewing process has five main stages: mashing, boiling, fermenting, conditioning, and packaging.
- Most beginner batches take three to six weeks from brew day to drinkable beer.
- Sanitation is the single most important factor in preventing off-flavors and spoilage.
- Extract brewing kits lower the barrier to entry significantly for first-timers.
- Your first batch may not be perfect - that is expected and part of the learning process.
Why Home Brewing Appeals to So Many People
Making beer at home occupies an interesting space between craft hobby and kitchen science. For many people, the appeal is straightforward: curiosity about how something they drink regularly is actually made. For others, it's the creative satisfaction of tailoring a recipe to personal taste - more bitter, more fruity, lighter, darker.
Home brewing also tends to deepen appreciation for commercial beer. Once you understand what goes into producing a clean, balanced pint, the range of styles on a tap list starts to make a lot more sense. If you've ever felt uncertain navigating a beverage menu, the same principle applies - see how reading a wine list gets easier with context once you understand what you're looking at.
The barrier to entry is genuinely lower than most people expect. A basic starter kit and a few hours on a weekend afternoon is enough to produce your first batch.
The Four Core Ingredients
Wort
The sweet, unfermented liquid extracted from malted grain during brewing. It becomes beer once yeast is added and fermentation begins.
Fermentation
The biological process in which yeast consumes sugars and produces alcohol and carbon dioxide as byproducts.
Pitching
The act of adding yeast to cooled wort to begin fermentation. The term comes from traditional brewing language.
Airlock
A small device fitted to the fermenter lid that lets CO₂ escape during fermentation while preventing outside air and contaminants from entering.
Specific Gravity
A measure of a liquid's density relative to water. Brewers use it to track sugar content before and after fermentation, which helps calculate ABV.
Extract Brewing
A beginner-friendly brewing method that uses pre-processed malt extract (syrup or powder) instead of whole grain, skipping the mashing stage.
Every beer, from a light lager to a robust stout, is built from the same four foundational ingredients. Understanding what each one contributes makes the rest of the process much easier to follow.
- Water: Makes up roughly 90-95% of beer by volume. Mineral content influences flavor subtly; most municipal tap water works fine for beginner batches.
- Malted grain (usually barley): Provides fermentable sugars, color, and much of the flavor base. Grain is kilned (roasted) to varying degrees - light kilning produces pale, biscuity flavors; darker roasting creates chocolate and coffee notes.
- Hops: The cone-shaped flowers of the Humulus lupulus plant. Added during the boil, they contribute bitterness that balances the sweetness of malt, as well as aroma and flavor ranging from citrusy and floral to earthy and resinous.
- Yeast: The microorganism that consumes the sugars released from grain and produces alcohol and carbon dioxide. Yeast strain choice also shapes flavor - fruity esters, dry finishes, and spicy phenols all originate here.
The Brewing Process, Step by Step
Home brewing follows a reliable sequence regardless of what style you're making. Extract brewing simplifies the early stages, but the fundamentals remain the same.
- Mashing (all-grain only): Crushed grain is steeped in hot water, typically around 148-158°F, to activate enzymes that convert starches into fermentable sugars. Extract brewers skip this step - the conversion has already been done for them.
- The boil: The liquid (called wort) is brought to a rolling boil for 60 minutes. Hops are added at specific intervals - early additions for bitterness, late additions for aroma.
- Fermentation: Wort is cooled, transferred to a sanitized fermenter, and yeast is pitched in. Over one to two weeks, yeast converts sugars into alcohol and CO₂. An airlock allows gas to escape without letting outside air in.
- Conditioning: The beer rests after primary fermentation, allowing flavors to mellow and sediment to settle. This can happen in the fermenter or a secondary vessel.
- Packaging: Beer is transferred to bottles or a keg. For bottles, a small amount of sugar is added to trigger a secondary fermentation that naturally carbonates the beer over one to two weeks.
Sanitation Is Your Most Important Habit
Any equipment that contacts your beer after the boil must be thoroughly sanitized - not just clean. Use a no-rinse sanitizer solution (common options are widely available at homebrew supply stores) and allow contact time per the product instructions. Most off-flavors in beginner batches trace back to a sanitation gap somewhere in the process.
What to Realistically Expect as a Beginner
Your first batch is primarily a learning experience. That's not a caveat - it's genuinely useful framing. Most first-time brewers produce drinkable beer; some produce excellent beer. Occasional off-flavors or carbonation inconsistencies are common, and nearly always traceable to a specific process step that's easy to correct next time.
The most common beginner mistakes are sanitation gaps and temperature inconsistencies during fermentation. Keeping your fermenter at a stable temperature (typically 65-72°F for most ales) and sanitizing everything that touches post-boil beer are the two highest-leverage habits to develop early.
Temperature Swings Can Ruin Fermentation
Dramatic temperature fluctuations during fermentation stress yeast and can produce harsh, unpleasant flavors. Aim to keep your fermenter in a location where temperature stays consistent - a basement, closet, or insulated cooler works well for most home setups. Avoid placing it near heat vents or in direct sunlight.
If you're interested in experimenting further - including understanding how brewers make lower-alcohol options - our guide on how non-alcoholic beers are produced provides useful context on the technical differences.
Alcohol Strength and What It Means for Your Brew
One of the more practical measurements in home brewing is ABV - the percentage of alcohol in the finished beer. Most standard ales and lagers fall between 4% and 6% ABV, though styles range widely from session beers under 4% to barleywines above 10%.
Home brewers estimate ABV using a hydrometer or refractometer. These tools measure the density (specific gravity) of the liquid before and after fermentation. The difference between the two readings tells you how much sugar was converted to alcohol. For a deeper look at what ABV numbers actually represent and why they matter when evaluating any beer, our guide on understanding alcohol by volume explains the concept in plain terms.
Home brewing is a hobby with a genuine learning curve, but one that rewards patience and attention to process. Start simple, keep notes on each batch, and the improvements from one brew to the next tend to be both measurable and satisfying.
Frequently Asked Questions

Author
Food Editorial Team
Food Editorial Team is the collective byline for our editorial team and contributor network. Articles published under this byline or an editorial pen name are researched, written, and reviewed according to our editorial standards for clarity, consistency, and independence before publication.
View all articles →